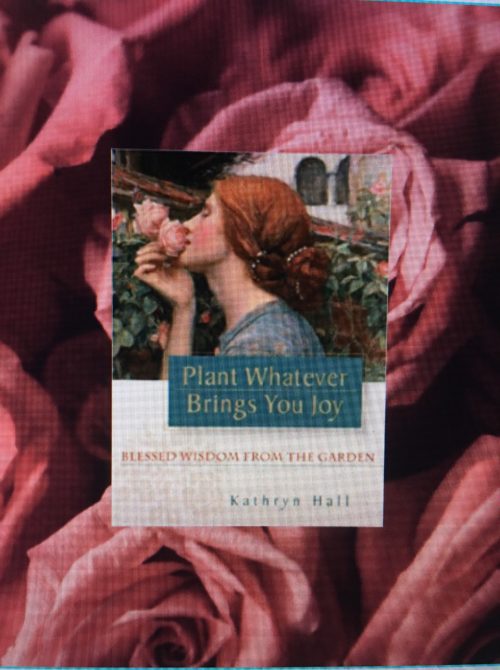
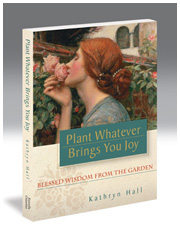
It’s true! Plant Whatever Brings You Joy: Blessed Wisdom from the Garden was published in July 2010! Gosh! Ten years old! And what a decade it has been! Plant Whatever Brings You Joy has allowed me to continue to meet gardeners and readers from around the globe for which I will ever be grateful.
Here are some of the highlights of this publishing journey:
*Having my book be carried in over sixty bookstores around the country including at San Francisco Airport!
*Having a chapter from my book be translated into Dutch by Ode Magazine.
*Discovering my e-book was carried by Walmart and bookstores around the world via Kobo books.
*Publishing articles in Science of Mind magazine, Journal for Quality and Participation (reaching the business community!), GreenPrints magazine, Western North Carolina Woman, and more.
*Receiving almost exclusively 5-star reviews on Amazon!
*Doing a booksigning at Readers Books in downtown Sonoma, with wine provided by Frey Winery. To this day I have fans who attended that event!
*Finding a graphic on Twitter quoting one of my lessons.
*Having over 1,200 folks watch my book trailer even though so many marketing people thought it was “too long”. I thought it was nice. 🙂
*Learning that readers of my book were spontaneously using it as an effective oracle.
*Receiving exclusively positive reviews from the media–without exception! You will find a list on Estrella Catarina!
*Doing a virtual book event with a book club in the UK! That was particularly very very fun! (I didn’t want to leave. Trust me.) Here they are. You can see why!
*Earning back what I invested in doing things My Way in the first six months after the book was published–and having Amazon deposit monies into my account monthly even ten years later!
*Having readers tell me over and over again two primary things:
“I love your book.”
“It’s sitting by my bed.”
There is more to come. I know that and welcome that. So many doors open for authors. This is a decision I will never regret.
My deepest thanks to all who have read Plant Whatever Brings You Joy, to those who have purchased it as gifts and to those who will one day buy the book for themselves. I am so very grateful. I hope my writing has touched your hearts and given you some things to think about as you move through your lives.
“Did you see the baby bird on the ground near our garden fence?” asked a next door neighbor. “Um, no.” He asked if I’d like to see him, which of course I did, and he brought me a small wire basket lined with a dish towel upon which quietly lay a small downy baby bird. He reassured me that he and his wife had googled the bird’s description and were fairly certain it was a dove. Next big question. “Would you like to take him?” Wow. OK.
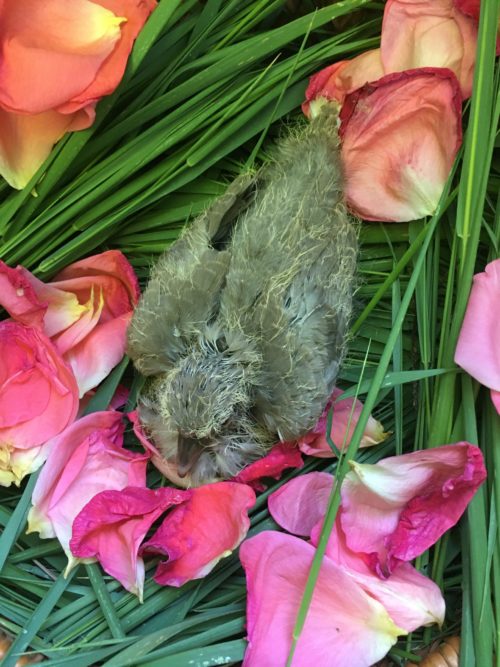
I gingerly took the basket and brought him home and began immediate research. Within minutes I had transferred him to one of my baskets, lined with long grasses and rose petals. This was a nice photo op, and looked pretty but further research revealed that grasses hold moisture, not what a baby needs. I added a layer of soft white cloth and a knitted piece to keep him warm. I then placed the basket down inside a deep green plastic container I normally used to hold cuttings from the garden. Over the top I placed a large very soft scarf to protect him and I left the entire arrangement on the picnic table for the afternoon and brought him indoors at night. In retrospect I think this was a good choice as it’s possible the parents might well have been watching me.
That afternoon I looked carefully for a nearby nest, searching trees with binoculars. Nothing made itself known. To my knowledge there was no bird rehab center going on in this county. This little guy was dependent upon me. I took this task upon myself quite willingly, feeling humbled and deeply moved by the unexpected arrival. It was not without feeling simultaneously what I would come to describe as “the need to replicate a mother or father dove’s skills based on the genetic memory of thousands of years.” No small task. Thank goodness for Google, though we all know those rabbit holes can be treacherous, rife with misinformation and bad advice. I found the International Dove Society and another similar site and watched vid after vid. A FB friend hooked me up with some women in the UK who sent me another link about feeding baby doves.
What one needs to know about baby doves (and pigeons) is that they do not feed as songbirds. The archetypal peep peep peep I’m hungry cry and willing mouths spread open is not what you are going to get with a baby dove. No. They rely instead on pushing their beaks (and thus their heads) down the throats of their parents to garner a sort of milk in the parents’ throats. Learning this tasked me with needing to find what felt like a reliable formula I could feed my new charge. Using research and intuition I ended up mixing in my blender boiled chicken, hard boiled egg yolk, brewer’s yeast, a bit of Vitamin B, a teeny bit of yogurt and a bit of warm water. If you ever find yourself in this unlikely situation look for the recipe of something called MacMilk online–created by a veterinarian. I adapted my mix from that. And he began to thrive. Baby Eurasian collar dove
Had I been trained I would have gotten a proper syringe and filled it with formula and pushed it gently into the crop of the baby dove. Since you can asphyxiate a dove if you do this wrong I opted instead to take my time (meaning 20-30 minutes) and give him the formula drop by drop in his mouth. And there is a trick to opening that mouth, which I learned after finding a vid of a guy in SoCal who showed us that you have to gently pinch the far back of the beak and this (more or less) gets the baby to open enough to feed him. Though it’s messy no matter how you do it (and some techniques are very messy!), and you have to actually clean him up with a soft warm wet cloth so he does not have formula in his feathers. Oh, my goodness. I fed this little one every two to three hours throughout the day and let him (and me) sleep at night, though I did get up a few nights to change out a hot water bottle I had placed next to the nest to be sure he maintained body temperature he needed. Dove parents keep babies warm until they can manage their own body temperatures and then they basically decide they are ready to fledge. I had that in my favor, as I knew he would mature quickly and be ready to fledge within the week.
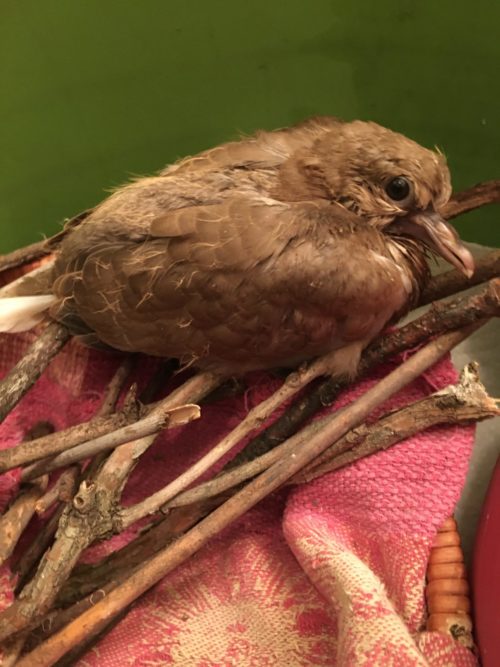
Here he was after a few days indoors.
Yes, this was a LOT of work. But I loved every moment and regarded it as an exceptional deeply rooted spiritual experience. #HashtagMothering
At some point I rang a bird rescue center in Sonoma County, and later one in Marin, which was helpful. I knew what I was doing was “illegal” but as I pointed out, we are in the middle of a pandemic. The Sonoma Center only takes native birds and getting in the car and driving to Marin for a near hundred mile trip was not happening, especially as I was confident the parents were nearby. The Sonoma center had me text down a vid and confirmed this little one was a Eurasian collar dove, who has not been in the States as long as the more common mourning dove, and that it was their opinion he was a fledgling. I took that to heart, and was encouraged, actually, but I wanted some reassurance he was strong enough to maybe make the transition on his own. Though I could hear the parents nearby I had no guarantee they might take over the job, though I did entertain a possible co-parenting arrangement. Haha.
As baby dove became stronger I began to take him out of doors. On one of those occasions the parents showed up–one on the roof of my house, one in a large tree close by. I repeated this the next day and the doves reappeared, first one parent, then the next, and landed in one of my butterfly bushes in the garden. It was an extraordinary almost mystical moment–one I will never forget. I decided then that baby was ready. Early the next morning I fed him and carried him in the basket to the picnic table. I set him down, and walked away, and within a couple of minutes he flew off into an heirloom walnut tree in the garden. Once he had flown I really could not see him again.
Here are his final moments with me.
Over the next few days I watched for him, knowing that was about me, not about him. And listened carefully to the comings and goings of the parent doves, tracking their moving about the neighborhood, hoping they had, indeed, taken it upon themselves to resume feeding their fledgling.
This was a most extraordinary experience that I am most grateful for. Have you had an experience like this?
Love and garden blessings,
Kathryn xoxo
Book Notes: Many thanks to any of you who bought copies of Plant Whatever Brings You Joy as Mother’s Day gifts. Appreciated! Amazon noticed and ordered extra copies. Perhaps you have a father who would also enjoy? Father’s Day coming up!
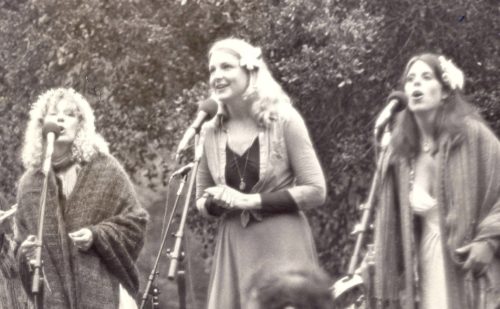
Kathryn, Kitty and Maloah, Rainbow Festival, Mt. Tamalpais, Marin County
In pondering what else I might do to shore myself up during these challenging times it occurred to me that I could turn to those many years I was singing, and what I knew about strengthening my voice–and thus my lungs and diaphragm. I had intended to announce on FB that I was committing to singing one half hour a day for my own well being. Imagine my delight and surprise when my daughter, Antonia Hall, a psychologist, sent me a post she had just written for her own blog on reasons to “sing through the stress”. I asked her immediately if I might post here as a guest blog post and she said yes! As I had begun singing recently and posting songs to my YouTube channel, I will weave in a couple of songs, including “Cara’s Song” about which I write in my book Plant Whatever Brings You Joy: Blessed Wisdom from the Garden. You may recall I included the verses to that song in my book. Now you can hear the melody.
8 Reasons to Sing Through the Stress
Want a way to calm your stressed-out nervous system that’s fun, easy, and can be done almost anywhere? As it turns out, like many of the activities you may have left behind in your childhood, singing can offer you a wealth of health and wellness benefits. Whether or not you have any true talent has little impact on the many perks you’ll get from singing – even if you do it for just a few minutes a day.
Let’s look at some of the impressive physical and psychological health benefits singing offers.
1. Singing is a way to instantly shift your mood. The power of music is amplified when you sing along because you are fully immersing yourself in the experience. Choose songs that have been proven favorites that make you smile, and maybe even get you dancing!
2. You’ll increase your sense of well-being. Studies show that when you sing, your body releases mood-elevating and stress-reducing hormones. That makes singing an excellent method for calming your nervous system while also elevating your spirits.
3. It’s an easy mindfulness exercise. I’m sure you’ve heard that being in the present moment can ease stress and create a more peaceful mind. Singing is a fail-proof form of mindfulness, and that makes it a fantastic tool in the wellness tool chest, especially in these challenging times.
4. Singing is a way to boost your immune system. Science shows that singing naturally boosts the immune system. Anything that keeps your immune system strong is gold, and you can reap benefits with only a few songs each day.
5. Vocalizing is a form of exercise for your diaphragm. Singing gives your lungs a workout, while oxygenating the blood, which will make your whole body healthier and leave you feeling more alert.
6. Increasing lung capacity has the added benefit of strengthening the body. Expanding your chest can ease muscle tension while increasing muscle strength in the shoulders and back. This can be particularly helpful if you hold stress in your upper body.
7. Singing is great for your brain. Neuroscientist have found that singing stimulates new neural pathways in the brain. That makes it a wonderful way to spark creativity. Feeling stuck or “blocked” in your endeavors? Singing could be the way you find new answers.
8. There’s power in claiming your voice. Raising your voice in song can be a powerful experience. You may find that singing leaves you with a renewed sense of strength, too.
Thanks, Antonia! Great post!
And I close this with a second song, “Will You Remember Who You Are?” written by Gary Malkin, and posted on YouTube with his permission. I was inspired one morning to learn the song when he put it on Facebook, and then played his version and accompanied him. I hope you enjoy.
Please practice protocols, stay at home as much as you can, and find those things that nurture you during this time. I’d like to hear some of you are singing!
Love and blessings,
Kathryn xoxo
Book Notes: Guess what? I’ve begun something new! I recently did a Skype gathering with a wonderful Book Club in the UK, arranged by friend Liz Watkin, whom I know through the gardening blogger community, and who was a guest blog poster on this very blog! It was SO MUCH fun! Many thanks to her for that. And if you are interested in arranging a Book Club gathering, let me know!